2011年10月23日 星期日

Qt - 依QLineEdit的內容自動調整整個視窗的大小

Qt - 選擇資料夾或特定的檔案的例子中,當使用者選擇檔案或資料夾後,會將其完整路徑放到QLineEdit裡面~
但是,若路徑過長,並不會調整整個視窗的大小,讓使用都可以完整的看到其路徑。

若要調整其視窗大小,必需要調整Layout的相關關係~~

在Qt裡面,若有受到Layout的控制的話,裡面的元件的大小會受到以下兩個因素影響
1. Qt Layout的限制
QLayout::SetDefaultConstraint
最小尺吋設定為minimumSize ()
QLayout::SetFixedSize
視窗為sizeHint (),且不能被改變大小。
QLayout::SetMinimumSize
視窗被設定為minimumSize ()且不能被變的更小
QLayout::SetMaximumSize
視窗被設定為maximumSize ()且不能被變的更大
QLayout::SetMinAndMaxSize
最小尺吋為minimumSize ()、最大尺吋是maximumSize ()
QLayout::SetNoConstraint
不受到Layout的控制
2. 子視窗本身也受到自己的size policies及其最大/最小值的影響
QSizePolicy::Fixed
sizeHint () - sizeHint ()
QSizePolicy::Minimum
sizeHint () - 無限大
QSizePolicy::Maximum
0 - sizeHint ()
QSizePolicy::Preferred
0 - 無限大
QSizePolicy::Expanding
0 - 無限大
QSizePolicy::MinimumExpanding
sizeHint () - 無限大
QSizePolicy::Ignored
0 - 無限大

以下就是由Qt - 選擇資料夾或特定的檔案改的結果
main.cpp

#include <QApplication>
#include "MyWidget.h"

int main (
int argc,
char *argv[]
)
{
QApplication app (argc, argv);

MyWidget myWidget;

myWidget.show ();

return app.exec ();
}

MyWidget.h
#ifndef _MY_WIDGET_H_
#define _MY_WIDGET_H_

#include <QWidget>

class QLabel;
class QPushButton;
class QLineEdit;

class MyWidget : public QWidget {
Q_OBJECT

public:
MyWidget (QWidget *parent = 0);

private slots:
void browse ();
void ChangeSelectFile (bool);
void AdjustMainWindowSize (const QString &);

private:
QLabel *myLabel;
QPushButton *myPushButton;
QLineEdit *myLineEdit;
bool SelectFile;
};

#endif //#ifndef _MY_WIDGET_H_

MyWidget.cpp
#include <QLabel>
#include <QPushButton>
#include <QLineEdit>
#include <QVBoxLayout>
#include <QHBoxLayout>
#include <QFileDialog>
#include <QGroupBox>
#include <QRadioButton>
#include <QSizePolicy>

#include "MyWidget.h"

MyWidget::MyWidget (QWidget *parent) : QWidget (parent) {
//
// init
//

myLabel = NULL;
myLineEdit = NULL;
myPushButton = NULL;

//
// Create Label component
//

myLabel = new QLabel (tr ("Target Name"), this);

//
// Create LineEdit component
//

myLineEdit = new QLineEdit (this);

//
// Set the width of QLineEdit from sizeHint () to max
//

myLineEdit->setSizePolicy (QSizePolicy::MinimumExpanding, QSizePolicy::Fixed);

//
// Create GroupBox and RadioButton component
//

QGroupBox *box = new QGroupBox (tr ("Select Type"));
QRadioButton *radio1 = new QRadioButton (tr ("File"));
QRadioButton *radio2 = new QRadioButton (tr ("Directory"));

//
// Set the default checked RadioButton for SelectFile
//

radio1->setChecked (true);
SelectFile = true;

//
// Set RadioButton into QHBoxLayout
// And set RadioButton into same GroupBox
//

QVBoxLayout *VLayout = new QVBoxLayout;
VLayout->addWidget (radio1);
VLayout->addWidget (radio2);
box->setLayout (VLayout);

//
// Create QPushButton component
//

myPushButton = new QPushButton (tr ("&Browse..."), this);

//
// Add all the components into QHBoxLayout
//

QHBoxLayout *layout = new QHBoxLayout;
layout->addWidget (myLabel);
layout->addWidget (myLineEdit);
layout->addWidget (box);
layout->addWidget (myPushButton);

//
// Set main window to the sizeHint () and can not be changed
//

layout->setSizeConstraint (QLayout::SetFixedSize);
// layout->setSizeConstraint (QLayout::SetMinimumSize);

//
// Set the main Layout for MyWidget
//

this->setLayout (layout);

//
// Set the SIGNAL and SLOT for this component
//

connect (myPushButton, SIGNAL (clicked ()), SLOT (browse ()));
connect (radio1, SIGNAL (toggled (bool)), this, SLOT (ChangeSelectFile (bool)));

//
// When the content of QLineEdit changed, try to resize the Main Window
//

connect (myLineEdit, SIGNAL (textChanged (const QString &)), this, SLOT (AdjustMainWindowSize (const QString &)));
}

void MyWidget::browse () {

QString TargetItem;

QFileDialog myFileDialog (this);
if (SelectFile) {
TargetItem = myFileDialog.getOpenFileName (this, tr ("Open File"), QDir::currentPath (), tr ("All C++ files (*.cpp *.h)"));
} else {
TargetItem = myFileDialog.getExistingDirectory (this, tr ("Select Folder"), QDir::currentPath ());
}
if (TargetItem.isEmpty ()) {
// myLineEdit->setText (myFileDialog.directory ().absolutePath ());
// myLineEdit->clear ();
// do nothing
} else {
myLineEdit->setText (TargetItem);
}
}

void MyWidget::ChangeSelectFile (bool checked) {
SelectFile = checked;
}

void MyWidget::AdjustMainWindowSize (const QString & text) {
QFont myFont;
QFontMetrics fm (myFont);

//
// Calculate the width pixel by the number of word
//

myLineEdit->setMinimumWidth (fm.width (myLineEdit->text ()));

//
// Readjust the main window size by new MinimumWidth
//

// resize (sizeHint ());
}


這裡有一些部分要特別注意~
myLineEdit->setSizePolicy (QSizePolicy::MinimumExpanding, QSizePolicy::Fixed);

設定QLineEdit自身的尺寸策略(size policies)
寬度是sizeHint () ~ 無窮大
高度是限制在sizeHint ()

layout->setSizeConstraint (QLayout::SetFixedSize);

設定主視窗的Layout的長寬為sizeHint (),且不能被改變~

myLineEdit->setMinimumWidth (fm.width (myLineEdit->text ()));

這裡是根據QLineEdit所輸入的內容來決定QLineEdit的最小寬度是多少,
另外,要注意的是,用text ().size ()是回傳有幾個字元,但是,setMinimumWidth是要輸入要幾個pixel,因此,必需由目前使用的字型來決定幾個字元需要多少個pixel。

本程式會把使用者輸入的字串長度轉成pixel,並且設定為QLineEdit的最小長度。
當最小長度大於原本的sizeHint的時候,sizeHint就會被重新設定為MinimumWidth的寬度。
而layout則是根據sizeHint來調整MyWidget的小大~

因此,QLineEdit的寬度會保持在
QLineEdit::sizeHint() ~ fm.width (myLineEdit->text ())

在還沒有輸入任何資料前的樣子


在選擇完檔案或資料夾時,主視窗會自動變大~


在經過這個sample code後,若某一個元件是有被Layout來管理的話,要調整他的大小,沒有辦法直接設定他的大小,必需
1. 設定Layout的policy
2. 設定Widget本身的policy,其最大、最小的寬度
那麼Qt layout manager就可以跟據這一些資料來調整Widget最適合的大小。

參考資料:
QFontMetrics Class Reference
Measuring text width in Qt
QBoxLayout與QWidget之間的關係
2011年10月21日 星期五

Qt - 選擇資料夾或特定的檔案

目前打算做一個小程式,可以讓使用選擇特定的檔案或資料夾

main.cpp

#include <QApplication>
#include "MyWidget.h"

int main (
int argc,
char *argv[]
)
{
QApplication app (argc, argv);

MyWidget myWidget;

myWidget.show ();

return app.exec ();
}


MyWidget.h
#ifndef _MY_WIDGET_H_
#define _MY_WIDGET_H_

#include <QWidget>

class QLabel;
class QPushButton;
class QLineEdit;

class MyWidget : public QWidget {
Q_OBJECT

public:
MyWidget (QWidget *parent = 0);

private slots:
void browse ();

private:
QLabel *myLabel;
QPushButton *myPushButton;
QLineEdit *myLineEdit;
};

#endif //#ifndef _MY_WIDGET_H_


MyWidget.cpp
#include <QLabel>
#include <QPushButton>
#include <QLineEdit>
#include <QVBoxLayout>
#include <QFileDialog>

#include "MyWidget.h"

MyWidget::MyWidget (QWidget *parent) : QWidget (parent) {
// do nothing
myLabel = NULL;
myLineEdit = NULL;
myPushButton = NULL;

myLabel = new QLabel (tr ("Target Name"), this);

myLineEdit = new QLineEdit (this);

myPushButton = new QPushButton (tr ("&Browse..."), this);

connect (myPushButton, SIGNAL (clicked ()), SLOT (browse ()));

QHBoxLayout *layout = new QHBoxLayout (this);
layout->addWidget (myLabel);
layout->addWidget (myLineEdit);
layout->addWidget (myPushButton);

this->setLayout (layout);
}

void MyWidget::browse () {
// QString directory = QFileDialog::getExistingDirectory (this, tr ("Find Files"), QDir::currentPath ());

QFileDialog myFileDialog (this);
QString itemPath = myFileDialog.getOpenFileName (this, tr ("Open File"), QDir::currentPath (), tr ("All C++ files (*.cpp *.h)"));
if (itemPath.isEmpty ()) {
myLineEdit->setText (myFileDialog.directory ().absolutePath ());
} else {
myLineEdit->setText (itemPath);
}
}

結果如下圖所示


本來打算只利用QFileDialog::getOpenFileName ()就可以選擇檔案和資料夾~
就是當使用者沒有選擇檔案的時候,同時按下「開啟」,這樣就會選擇目前視窗的路徑~
但是,沒有選擇檔案的時候,按開啟並不會回傳值。所以,只好讓使用都可以選擇目前要選擇檔案還是資料夾。
sample code如下:
main.cpp
#include <QApplication>
#include "MyWidget.h"

int main (
int argc,
char *argv[]
)
{
QApplication app (argc, argv);

MyWidget myWidget;

myWidget.show ();

return app.exec ();
}

MyWidget.h
#ifndef _MY_WIDGET_H_
#define _MY_WIDGET_H_

#include <QWidget>

class QLabel;
class QPushButton;
class QLineEdit;

class MyWidget : public QWidget {
Q_OBJECT

public:
MyWidget (QWidget *parent = 0);

private slots:
void browse ();
void ChangeSelectFile (bool);

private:
QLabel *myLabel;
QPushButton *myPushButton;
QLineEdit *myLineEdit;
bool SelectFile;
};

#endif //#ifndef _MY_WIDGET_H_

MyWidget.cpp
#include <QLabel>
#include <QPushButton>
#include <QLineEdit>
#include <QVBoxLayout>
#include <QHBoxLayout>
#include <QFileDialog>
#include <QGroupBox>
#include <QRadioButton>

#include "MyWidget.h"

MyWidget::MyWidget (QWidget *parent) : QWidget (parent) {

//
// init
//

myLabel = NULL;
myLineEdit = NULL;
myPushButton = NULL;

//
// Create Label component
//

myLabel = new QLabel (tr ("Target Name"), this);

//
// Create LineEdit component
//

myLineEdit = new QLineEdit (this);

//
// Create GroupBox and RadioButton component
//

QGroupBox *box = new QGroupBox (tr ("Select Type"));
QRadioButton *radio1 = new QRadioButton (tr ("File"));
QRadioButton *radio2 = new QRadioButton (tr ("Directory"));

//
// Set the default checked RadioButton for SelectFile
//

radio1->setChecked (true);
SelectFile = true;

//
// Set RadioButton into QHBoxLayout
// And set RadioButton into same GroupBox
//

QVBoxLayout *VLayout = new QVBoxLayout;
VLayout->addWidget (radio1);
VLayout->addWidget (radio2);
box->setLayout (VLayout);

//
// Create QPushButton component
//

myPushButton = new QPushButton (tr ("&Browse..."), this);

//
// Add all the components into QHBoxLayout
//

QHBoxLayout *layout = new QHBoxLayout;
layout->addWidget (myLabel);
layout->addWidget (myLineEdit);
layout->addWidget (box);
layout->addWidget (myPushButton);

//
// Set the main Layout for MyWidget
//

this->setLayout (layout);

//
// Set the SIGNAL and SLOT for this component
//

connect (myPushButton, SIGNAL (clicked ()), SLOT (browse ()));
connect (radio1, SIGNAL (toggled (bool)), this, SLOT (ChangeSelectFile (bool)));
}

void MyWidget::browse () {

QString TargetItem;

QFileDialog myFileDialog (this);
if (SelectFile) {
TargetItem = myFileDialog.getOpenFileName (this, tr ("Open File"), QDir::currentPath (), tr ("All C++ files (*.cpp *.h)"));
} else {
TargetItem = myFileDialog.getExistingDirectory (this, tr ("Select Folder"), QDir::currentPath ());
}
if (TargetItem.isEmpty ()) {
// myLineEdit->setText (myFileDialog.directory ().absolutePath ());
// myLineEdit->clear ();
} else {
myLineEdit->setText (TargetItem);
}
}

void MyWidget::ChangeSelectFile (bool checked) {
SelectFile = checked;
}


設定為選擇File:

當按Browse後,會出現以下的視窗,並且選擇一個限定的副檔名的檔案

當按下開啟後,會把選擇的檔案的路徑放在QLineEdit component裡面


另外,若選擇Directory的話,並且選擇Browse,會跳出以下的視窗


當按下確定後,就會把資料夾的路徑放在QLineEdit裡面,如下圖所示


參考資料:
QFileDialog Class Reference
Widgets and Layouts
Qt 第二章 创建对话框--子类化QDialog
QRadioButton Class Reference
QAbstractButton Class Reference
QLineEdit Class Reference

2011年10月18日 星期二

Advanced Format Driver

在2011年1月後出的硬碟都會支援Advanced Format
原本的硬碟都是採用512 byte為一個chunk,
在Advanced Format是採用4k為一個chunk。

聽說在XP上使用這一個硬碟的話,會有很多問題~
目前可能還是不打算使用這一種新的硬碟~

參考資料:
已經來臨的硬碟格式變動 先進格式
體驗最新 WD 先進格式化技術硬碟!

放棄XP系統 WD硬盤先進格式化使用要點
先進格式化

2011年10月13日 星期四

在Qt下呼叫外部指令

這裡透過Qt的QProcess來呼叫外部程式,並且把結果顯示在QTextEdit
main.cpp

#include <QApplication>
#include <QTextEdit>
#include <QProcess>

int main (
int argc,
char *argv[]
)
{
QApplication app (argc, argv);

QTextEdit *TextEdit = new QTextEdit;

TextEdit->show ();

QProcess *proc = new QProcess;

// proc->startDetached ("ping 168.95.1.1");
proc->start ("ping 168.95.1.1");

if (proc->waitForFinished (-1)) {
TextEdit->append (proc->readAll ());
} else {
TextEdit->append ("Error");
}

return app.exec ();
}

不過,以上的程式有一個缺點,就是只有當外部指令結束之後,才會把結果顯示在QTextEdit裡面,這個時候會造成畫面當掉的感覺~

透過processEvent ()
可以適時的更新Qt的畫面~
但是仍會頓頓的~
main.cpp
#include <QApplication>
#include <QTextEdit>
#include <QProcess>

int main (
int argc,
char *argv[]
)
{
QApplication app (argc, argv);

QTextEdit *TextEdit = new QTextEdit;

TextEdit->show ();

QProcess *proc = new QProcess (TextEdit);

int x = 0;


// proc->startDetached ("ping 168.95.1.1 -t");
proc->start ("ping 168.95.1.1 -t");

while (proc->state () == QProcess::Running) {
x++;
// while (1) {
if (proc->waitForReadyRead (-1)) {
if (x == 10) {
proc->close ();
break;
}
TextEdit->append (proc->readAll ());
app.processEvents ();
} else {
TextEdit->append ("Error");
}
}

return app.exec ();
}


最後,透過signslot,當有資料可讀的時候,才去讀資料,終於解決會頓頓的情況了。
以下是sample code
MyTextEdit.h
#ifndef _MY_TEXT_EDIT_H_
#define _MY_TEXT_EDIT_H_

#include <QTextEdit>

class QProcess;

class MyTextEdit : public QTextEdit {
Q_OBJECT

public:
MyTextEdit (QWidget *parent = 0);
void StartCmd ();

public slots:
void AppendContextFromStandOut ();
void AppendContextFromStandErr ();
void AppendContext ();

private:
QProcess *MyProc;
};

#endif //#ifndef _MY_TEXT_EDIT_H_


MyTextEdit.cpp
#include "MyTextEdit.h"
#include <QProcess>

MyTextEdit::MyTextEdit (QWidget *parent) : QTextEdit (parent) {
// do nothing
}

void MyTextEdit::AppendContextFromStandOut () {
this->append (MyProc->readAllStandardOutput ());
}

void MyTextEdit::AppendContextFromStandErr () {
this->append (MyProc->readAllStandardError ());
}

void MyTextEdit::AppendContext () {
this->append (MyProc->readAll ());
}

void MyTextEdit::StartCmd () {

MyProc = new QProcess (this);

// connect (MyProc, SIGNAL(readyReadStandardOutput ()), this, SLOT(AppendContextFromStandOut ()));
// connect (MyProc, SIGNAL(readyReadStandardError ()), this, SLOT(AppendContextFromStandErr ()));
connect (MyProc, SIGNAL(readyRead ()), this, SLOT(AppendContext ()));

MyProc->start ("ping 168.95.1.1 -t");
}


main.cpp
#include <QApplication>
#include "MyTextEdit.h"

int main (
int argc,
char *argv[]
)
{
QApplication app (argc, argv);

MyTextEdit *TextEdit = new MyTextEdit;

TextEdit->show ();

TextEdit->StartCmd ();

return app.exec ();
}

最後輸出如下

原版的如下:


耶,怎麼多出那麼多空白行呢?
為了去了解,輸出的內容是什麼,使用一個很好用的函式QByteArray::toHex ()
有以下三點發現
1. Qt還是使用Unix換行的方式,只有0x0a("\n");而在Windows下的換行為0x0a("\r"),0x0d("\n")。因此,必需要移除掉多餘的0x0d
2. 我們由QProcess讀取出來的output本身就有換行符號(0x0a),而每做一個QTextEdit::append ()前,也會跳到新的一行,因此,QTextEdit::append ()多的這一個換行就變成是多餘的了~所以,必需用QTextEdit::insertPlainText ()來取代
3. 因為,QTextEdit::insertPlainText ()是由目前鼠標的位置直接加入字串。所以必需另外,把QTextEdit設定為disable,避免讓使用著移動滑鼠來改變鼠標的位置。
只需要修改MyTextEdit.cpp,程式碼如下:
#include "MyTextEdit.h"
#include <QProcess>
#include <QChar>

MyTextEdit::MyTextEdit (QWidget *parent) : QTextEdit (parent) {
this->setEnabled (false);
}

void MyTextEdit::AppendContextFromStandOut () {
this->append (MyProc->readAllStandardOutput ());
}

void MyTextEdit::AppendContextFromStandErr () {
this->append (MyProc->readAllStandardError ());
}

void MyTextEdit::AppendContext () {

QByteArray TempByteArray(MyProc->readAll ());

QString TempString(TempByteArray);

TempString.remove (QChar(0x0d));

// this->append (TempByteArray.toHex ());
// this->append (TempString);
this->insertPlainText (TempString);

}

void MyTextEdit::StartCmd () {

MyProc = new QProcess (this);

// connect (MyProc, SIGNAL(readyReadStandardOutput ()), this, SLOT(AppendContextFromStandOut ()));
// connect (MyProc, SIGNAL(readyReadStandardError ()), this, SLOT(AppendContextFromStandErr ()));
connect (MyProc, SIGNAL(readyRead ()), this, SLOT(AppendContext ()));

MyProc->start ("ping 168.95.1.1");
}

結果如下:


但是,直接把0x0d("\r")這字元移除掉,看起來不是很好的辦法,理論上應該是把"\r\n"直接取代成"\n"比較合理
修改MyTextEdit.cpp結果如下:
#include "MyTextEdit.h"
#include <QProcess>
#include <QChar>

MyTextEdit::MyTextEdit (QWidget *parent) : QTextEdit (parent) {
this->setEnabled (false);
}

void MyTextEdit::AppendContextFromStandOut () {
this->append (MyProc->readAllStandardOutput ());
}

void MyTextEdit::AppendContextFromStandErr () {
this->append (MyProc->readAllStandardError ());
}

void MyTextEdit::AppendContext () {

QByteArray TempByteArray(MyProc->readAll ());

QByteArray WinNewLine ("\r\n"), UnixNewLine ("\n");

TempByteArray.replace (WinNewLine, UnixNewLine);

QString TempString(TempByteArray);

// this->append (TempByteArray.toHex ());
// this->append (TempString);
this->insertPlainText (TempString);

}

void MyTextEdit::StartCmd () {

MyProc = new QProcess (this);

// connect (MyProc, SIGNAL(readyReadStandardOutput ()), this, SLOT(AppendContextFromStandOut ()));
// connect (MyProc, SIGNAL(readyReadStandardError ()), this, SLOT(AppendContextFromStandErr ()));
connect (MyProc, SIGNAL(readyRead ()), this, SLOT(AppendContext ()));

MyProc->start ("ping 168.95.1.1");
}


在繼續補足其它功能的時候,意外發現,我已經把視窗關掉了,為什麼我執行的外部指令還在執行哩~

原因就是,我在main.cpp裡面是宣告一個MyTextEdit的指標變數,並且指到我建立的記憶體空間(new QTextEdit),當主程式關掉之後,MyTextEdit的指標變數會release給系統(因為,存活的範圍只有在main的{}裡面),但是,MyTextEdit建立的記憶體空間就不會release給系統,除非delete掉這一個空間。

要解決一個方法,就是在main.cpp裡面,宣告一個物件而不是宣告一個指標來指到一個要求的記憶體位址。
main.cpp
#include <QApplication>
#include "MyTextEdit.h"

int main (
int argc,
char *argv[]
)
{
QApplication app (argc, argv);

MyTextEdit TextEdit;

TextEdit.show ();

TextEdit.StartCmd ();

return app.exec ();
}

MyTextEdit.h
#ifndef _MY_TEXT_EDIT_H_
#define _MY_TEXT_EDIT_H_

#include <QTextEdit>

class QProcess;

class MyTextEdit : public QTextEdit {
Q_OBJECT

public:
MyTextEdit (QWidget *parent = 0);
void StartCmd ();
bool IsScrollDown ();

public slots:
void AppendContext ();
void MoveScrollDown ();

private:
QProcess *MyProc;
};

#endif //#ifndef _MY_TEXT_EDIT_H_

MyTextEdit.cpp
#include "MyTextEdit.h"
#include <QProcess>
#include <QChar>
#include <QScrollBar>
#include <QDebug>

MyTextEdit::MyTextEdit (QWidget *parent) : QTextEdit (parent) {
MyProc = NULL;
setReadOnly (true);
// setTextInteractionFlags (textInteractionFlags() & Qt::NoTextInteraction);
// setTextInteractionFlags(Qt::TextSelectableByMouse | Qt::TextSelectableByKeyboard);
}

void MyTextEdit::AppendContext () {

bool KeepDownScroll = false;

int OrgScrollBarValue = 0;

//
// Get the output string
//

QByteArray AppendByteArray(MyProc->readAll ());

//
// Get the original ScrollBar value
//

OrgScrollBarValue = verticalScrollBar ()->value ();

QByteArray WinNewLine ("\r\n"), UnixNewLine ("\n");

//
// Replace "\r\n" by "\n"
//

AppendByteArray.replace (WinNewLine, UnixNewLine);

QString AppendString(AppendByteArray);

// this->append (AppendByteArray.toHex ());

if (IsScrollDown ()) {
if (!(textCursor ().hasSelection () || textCursor ().hasComplexSelection())) {
//
// When user select some range or the scroll is already under the buttom
// set the scroll under the buttom
//

KeepDownScroll = true;
}
}

//
// In order to append string in the end of text
// have to get the end cursor of the text
// After append the string, return the cursor to the original status
//

QTextCursor EndCursor, OriginalCursor;
EndCursor = OriginalCursor = textCursor ();
EndCursor.movePosition (QTextCursor::End);
setTextCursor (EndCursor);

//
// Append the string in the end of text
//

insertPlainText (AppendString);

//
// return the cursor to the original status
//

setTextCursor (OriginalCursor);

//
// Set the scrollbar value be the original value
//

QScrollBar *ScrollBar = verticalScrollBar ();
ScrollBar->setValue (OrgScrollBarValue);

//
// When user select some range or the scroll is already under the buttom
// set the scroll under the buttom
//

if (KeepDownScroll) {
MoveScrollDown ();
}

}

void MyTextEdit::StartCmd () {

MyProc = new QProcess (this);

connect (MyProc, SIGNAL(readyRead ()), this, SLOT(AppendContext ()));

MyProc->start ("ping 168.95.1.1 -t");
}

void MyTextEdit::MoveScrollDown () {

// Method 1
// QTextCursor c = textCursor ();
// c.movePosition (QTextCursor::End);
// setTextCursor (c);

// Method 2
QScrollBar *ScrollBar = verticalScrollBar ();
ScrollBar->setValue (ScrollBar->maximum ());

}

bool MyTextEdit::IsScrollDown () {

QScrollBar *ScrollBar = verticalScrollBar ();

if (ScrollBar->value () == ScrollBar->maximum ()) {
return true;
} else {
return false;
}
}


結果如下:
1. 當原本右邊的ScrollBar原本就在底部的話,就算文字內容增加,ScrollBar仍會保持在底部

2. 當使用者有圈選內容的話,就算文字內容增加,ScrollBar會保持在原來的位置,若原本的ScrollBar是在底部的話,會因為文字內容增加,而讓ScrollBar離開底部

3. 當使用者移動ScrollBar離開底部時,當文字內容增加,ScrollBar仍會保持在原來的位置。但當使用者把ScrollBar拉回底部時,當文字內容增加,ScrollBar會依然保持在底部。


參考資料:
QT下实现对linux 的Shell 调用 的几种方法 QProcess AND QThread
QTextEdit Class Reference
QProcess Class Reference
QProcess运行外部程序
怎么处理QT的UI界面假死的情况
QT程序 避免假死、无反应现象
QT中使用QProcess启用外部程序||exe
关于窗口调用外部程序及接收返回内容的调试
QT下解决换行符、回车符与Windows不一致的问题
解决QProcess對象調用execute執行cmd命令不支持中文和空格的問題
VCard
Qt - QTextEdit自動捲到底
QT中使用QProcess启用外部程序

2011年10月12日 星期三

夢想

如果對夢想沒有熱情,
所有與它相關的事物也不可能有熱情。
要完成夢想,
取決於你有多少熱情,
如果我們對夢想的喜愛,
沒有到癡狂的地步,
就會非常容易放棄。

設定Qt的執行檔的圖示

先建立一個ICO format bitmap file
Calc.ico

再建立一個Calc.qrc檔~內容為

IDI_ICON1               ICON    DISCARDABLE     "Calc.ico"


並且在pro檔裡面加入以下的內容
RC_FILE  += Calc.qrc


透過qmake重新建立Makefile

重新編譯後,產生的執行檔就有圖示了。


在執行檔的左上角的小圖示也會跟著變動~


參考資料:
Setting the Application Icon
The Qt Resource System
如何更改執行檔的圖案

2011年10月10日 星期一

Inno Setup - 進階設定

1. 修改安裝過程的圖片

; Script generated by the Inno Setup Script Wizard.
; SEE THE DOCUMENTATION FOR DETAILS ON CREATING INNO SETUP SCRIPT FILES!

#define MyAppName "Caspar_Calc"
#define MyAppVersion "1.0"
#define MyAppPublisher "Caspar Company, Inc."
#define MyAppURL "http://ccd9527.blogspot.com"
#define MyAppExeName "Calc.exe"

[Setup]
; NOTE: The value of AppId uniquely identifies this application.
; Do not use the same AppId value in installers for other applications.
; (To generate a new GUID, click Tools | Generate GUID inside the IDE.)
AppId={{9436BBE4-5C37-413F-9D7D-92F4B8EB131B}
AppName={#MyAppName}
AppVersion={#MyAppVersion}
WizardImageFile=D:\Release\Inno Setup\install.bmp
WizardSmallImageFile=D:\Release\Inno Setup\install2.bmp

AppVerName={#MyAppName} {#MyAppVersion}
(以下略)

圖片限定使用bmp且大小上限是164x314 pixels
WizardImageFile變數是顯示一開始安裝的第一個畫面~


圖片限定使用bmp且大小上限是55x58 pixels
WizardSmallImageFile的部分是設定安裝右上角的小圖


2. 指定壓縮方式
在[Setup]區段可以選擇壓縮的方式
在說明檔裡面,有以下的值可以使用
zip
zip/1 through zip/9
bzip
bzip/1 through bzip/9
lzma
lzma/fast
lzma/normal
lzma/max
lzma/ultra (review memory requirements below before using)
lzma/ultra64 (review memory requirements below before using)
lzma2
lzma2/fast
lzma2/normal
lzma2/max
lzma2/ultra (review memory requirements below before using)
lzma2/ultra64 (review memory requirements below before using)
none
Default value:
lzma2/max

預設是使用lzma2/max
zip壓縮方式比較快,而且需要記憶體的空間比較小
lzma2是使用7z的演算法,壓縮效率比較好,但是,需要的時間與記憶體空間比較多

3. 為要執行的檔案建立捷徑
在[Icons]的區段加入以下的內容
Name: "{userdesktop}\{#MyAppName}"; Filename: "{app}\{#MyAppExeName}";WorkingDir: "{app}"; IconFilename: "D:\Release\Inno Setup\OA6.ico"; Comment: "快捷方式"


4. 安裝完後,顯示ReadMe文件
在[Files]區段裡面ReadMe文件最後的Flags設定isreadme
而且一次可以輸入多個ReadMe檔案
Source: "D:\Release\Inno Setup\ReadMe.txt"; DestDir: "{app}";Flags:isreadme
Source: "D:\Release\Inno Setup\ReadMe_Doc.doc"; DestDir: "{app}";Flags:isreadme


5. 在程式安裝目錄下,建立一個資料夾
在[Files]區段輸入以下內容
Name: "{app}\WorkDir"

這樣在安裝後,會建立WorkDir的資料夾


當然這個文件夾是空白的,一般可用來作為初始工作的目錄或者保存結果的目錄。
另外,上面的這種情況下,如果移除程式,該資料夾會被如何處理呢?
1.如果資料夾是空白的,該資料夾會被刪除。
2.如果資料夾非空,該資料夾會被保留

6. 有選擇性的安裝元件
[Components]
Name: main; Description: "主程式(必選)"; Types:full compact custom; Flags: fixed
Name: help; Description: "說明檔"; Types: full

[Files]
Source: "D:\Release\Calc.exe"; DestDir: "{app}"; Flags: ignoreversion; Components:main
Source: "D:\Release\libgcc_s_dw2-1.dll"; DestDir: "{app}"; Flags: ignoreversion; Components:main
Source: "D:\Release\mingwm10.dll"; DestDir: "{app}"; Flags: ignoreversion; Components:main
Source: "D:\Release\QtCore4.dll"; DestDir: "{app}"; Flags: ignoreversion; Components:main
Source: "D:\Release\QtCored4.dll"; DestDir: "{app}"; Flags: ignoreversion; Components:main
Source: "D:\Release\QtGui4.dll"; DestDir: "{app}"; Flags: ignoreversion; Components:main
Source: "D:\Release\QtGuid4.dll"; DestDir: "{app}"; Flags: ignoreversion; Components:main
Source: "D:\Release\Inno Setup\ReadMe.txt"; DestDir: "{app}";Flags:isreadme; Components:help
Source: "D:\Release\Inno Setup\ReadMe_Doc.doc"; DestDir: "{app}";Flags:isreadme; Components:help
; NOTE: Don't use "Flags: ignoreversion" on any shared system files

在[Components]定義有哪一些Components的類別,
並且可以透過fixed關鍵字,來表示一定要安裝的元件
另外,在[Files]在最後,可以用Components來表示是屬於哪一類Components


參考資料:
Inno Setup入門(一) - 最簡單的安裝腳本
Inno Setup入門(十) -- 操作注冊表

2011年10月9日 星期日

建立安裝檔 - Inno Setup

1. 一開始建立一個空的script

2. 透過設置精靈設定


3. 設定應用程式的名稱、版號、應用程式公開者、相關網址


4. 設定要安裝的目標資料夾,預設是Program Files資料夾
也可以自定安裝的資料夾


5. 選擇主要的執行檔與同時要包進來的相關檔案


6. 把所有讓使用者是否建立一些捷徑


7. 選擇要顯示License的內容,與安裝前和安裝後要給使用者看的內容


8. 選擇在安裝過程中支援的語言


9. 設定Inno Setup產生的安裝檔要放的位置、安裝檔的名稱、安裝檔的icon


10. 是否在腳本裡面使用#define來定義一些變數,這樣在重覆使用一些變數上比較方便


11. 到了最後一步了


12. 根據剛剛的設定,建立了一個完整的Script,下一個階段就可以修改這一個Script來增加一些進階的修改


然後,就會產生安裝檔
D:\Release\Inno Setup\Caspar_Calc_Setup.exe

用Inno Setup+MSI的安靜模式參數來安裝
[Components] 組件
Filename: "{app}\INIT.EXE"; Parameters: "/x" 執行
說明裡有

參考資料:
InstallShield
安裝製作-Inno-Setup-5.2.2-繁體中文化版
Setup Factory
製做綠色軟體的安裝檔
大量安裝Inno Setup的批次檔
一鍵安裝 自動安裝 製作程式 Inno Setup
Inno Setup入門(一) - 最簡單的安裝腳本

QTreeWidget簡單例子

QTreeWidget是蠻符合可以讓使用客制化選擇的元件~~
裡面可以包含icon的設定,
子Item的設定
勾選的選項
當有需要的時候,Scroll會自動出現

#include <QApplication>
#include <QTreeWidget>

int
main (
int argc,
char *argv[]
)
{
QApplication app (argc, argv);

//
// Create a TreeWidget for store TreeWidgetItem
//

QTreeWidget *TreeWidget = new QTreeWidget;

//
// Set the title for QTreeWidget
//

QStringList ColumnTitle;
ColumnTitle.append ("Name");
ColumnTitle.append ("Comment");
TreeWidget->setHeaderLabels (ColumnTitle);

//
// Add the first item in the root of QTreeWidget
//

QStringList fileColumn;
fileColumn.append ("File Name");
fileColumn.append ("Comment for File Name");
QTreeWidgetItem *ParentItem = new QTreeWidgetItem (fileColumn);
ParentItem->setCheckState (0, Qt::PartiallyChecked);
TreeWidget->addTopLevelItem (ParentItem);

//
// Add the sub item of ParentItem QTreeWidget
//

QStringList ChildFileColumn;
ChildFileColumn.append ("Child Name");
ChildFileColumn.append ("Commet for Child Name");
QTreeWidgetItem *ChildItem = new QTreeWidgetItem (ChildFileColumn);
ChildItem->setCheckState (0, Qt::Checked);
ParentItem->addChild (ChildItem);

//
// Add the second sub item of ParentItem QTreeWidget
//

QStringList ChildFileColumn2;
ChildFileColumn2.append ("Child Name2");
ChildFileColumn2.append ("Comment for Child Name2");
QTreeWidgetItem *ChildItem2 = new QTreeWidgetItem (ChildFileColumn2);
ChildItem2->setCheckState (0, Qt::Unchecked);
ParentItem->addChild (ChildItem2);

//
// Set another root item into the QTreeWidget
//

QStringList AnotherfileColumn;
AnotherfileColumn.append ("Another Name");
AnotherfileColumn.append ("Comment for Another Name");
QTreeWidgetItem *AnotherItem = new QTreeWidgetItem (AnotherfileColumn);
AnotherItem->setCheckState (0, Qt::Unchecked);
TreeWidget->addTopLevelItem (AnotherItem);

TreeWidget->show ();

return app.exec ();
}


內容小於顯示區域,則不會出現ScrollBar


若內容大於要顯示的區域,則會出現ScrollBar


參考資料:
Qt4 Gossip: QTreeWidget 與 QTreeWidgetItem
QTreeWidget Class Reference
QTreeWidgetItem Class Reference

2011年10月7日 星期五

內文搜尋軟體 - DocFetcher

一直以來因為記憶力不好而困擾~~
所以透過blog來記錄學習的點點滴滴~~
工作的內容,
可能會有一些法津上的問題,確沒有辦法透過blog來記錄。

最近打算在電腦裡面,仿造一個檔案形式的blog,
會是由pdf、Office檔案所組成的方式。
檔名就像是blog的每一篇文章的標題,
內文就像是blog的內文一樣,隨時可以補充。

原本屬意Google Desktop,
但是,現在Google Desktop似乎不維護,並且不提供下載了~

最後找到一個Open source的軟體
DocFetcher
可以尋找Office文件檔案、PDF檔案、電子郵件內容、網路瀏覽記錄等等資訊
而且跟Google Desktop的差別是,Google Desktop是整台電腦去搜尋~~
而DocFetcher可以指定要搜尋哪一個資料夾內的資料~~
而且,DocFetch也有Portable版本的,非常好用~~


上面的圖分成五個部分:
1: 設定要尋找的檔案類型
2: 已經建立的索引,在空白處可以按右鍵,對某一個資料夾下的資料內容建立索引
3: 有含要尋找Keyword的檔案,直接對檔案點兩下,可以開啟檔案;另外,也可以用拖曳的方式,直接修改FileName, Title...的順序
4: 當上面的欄位有選擇檔案時,會顯示裡面的「文字」內容
5: 輸入要尋找的Keyword

使用後的感想:
實在是太符合我的需求了~
而且,效能也非常好,
建立的索引檔檔案大小也小~

參考資料:
Archivarius 3000
DNKA - remote desktop search tool
Everything 取代 Windows 內建搜尋,超快速檔案檢索工具
DocFetcher 快找文件檔案內文的輕巧桌面搜尋器,支援中文索引
Locate32 v3.1 - 超快速搜檔
Everything常見問題
為檔案加上Tag功能的桌面搜尋列:VistaGlance 1.2
研究生必備!超好用檔案搜尋軟體 Copernic Desktop Search
Ava Find 1.5 - 檔案搜尋工具就是要一個比一快就是了!

2011年10月2日 星期日

使用QScrollArea來控制元件

當Widget不夠大來顯示裡面的元件時,通常會使用Scroll Bar(捲軸),來調整我們要看到裡面元件的部分。

Qt已經有一個類別,它已經整合了Scroll bar,當裡面的元件超過外面可以顯示的大小時,會自動產生Scroll bar來讓使用者使用。

這裡要注意的是,QScrollArea裡面只能設定一個Main Widget(setWidget)
那如果要設定多個Widget的話呢?
1. 自定一個class是繼承QWidget,裡面就放置多個你要的Widget
2. 設定一個Widget,裡面有一個Layout去管理多個Widget
有空再各寫一個sample code

若要使用Layout必需要注意以下的文章「透過setGeometry設定相對於父類別的位置

以下就是QScrollArea類別最簡單的例子:
main.cpp

#include <QApplication>
#include <QPushButton>
#include <QScrollArea>

int
main (
int argc,
char *argv[]
)
{
QApplication app (argc, argv);

//
// Create a QScrollArea for the main Widget
//

QScrollArea *ScrollArea = new QScrollArea;
ScrollArea->setWindowTitle ("QScrollArea");

//
// Create a QPushButton
//

QPushButton *Button = new QPushButton ("Hello World", ScrollArea);
Button->resize (350, 350);

//
// Set the PushButton for the main widget in the ScrollArea
//

ScrollArea->setWidget (Button);
ScrollArea->setHorizontalScrollBarPolicy (Qt::ScrollBarAlwaysOn);
ScrollArea->setVerticalScrollBarPolicy (Qt::ScrollBarAlwaysOn);
ScrollArea->resize (200, 200);

ScrollArea->show ();

return app.exec ();
}


若QScrollBar裡面的Widget被Layout控制的話,則ScrollBar可能永遠不會出現~
因為是因為,裡面的Widget可能會被縮到最小,導致ScrollBar的Area仍然夠用,
當然就不會出現ScrollBar

參考資料:
Qt4 Gossip: QScrollArea
QScrollArea Class Reference

2011年9月30日 星期五

透過setGeometry設定相對於父類別的位置

在Qt提供了許多版面配置管理器 - QLayout, QGridLayout, QBoxLayout, QStackedLayout, QHBoxLayout, QVBoxLayout

這裡有一個使用Layout要注意的事情
QSizePolicy
This property holds the default layout behavior of the widget.

If there is a QLayout that manages this widget's children, the size policy specified by that layout is used. If there is no such QLayout, the result of this function is used.
意思應該是說,若已經有一個Layout在管理這一個Widget的話,那麼這一個Widget的大小就是根據這一個Layout的設定來調整。
若沒有Layout來管理這一個Widget的話,Widget才可以透過程式員自行控制。


這一些可能是我還不太會用~當視窗大小版變時,元件也同時會變大,位置變的非常不漂亮。

因此,我必需學會如何自定位置。

在QWidget可以使用setGeometry,可以設定在父類別的座標系統中,其座標位置應該在哪裡。

以下就是一個在一個Widget裡面的QPushButton設定其相對於父類別的相對位置和其大小。

#include <QApplication>
#include <QWidget>
#include <QPushButton>
#include <QLabel>

int
main (
int argc,
char *argv[]
)
{
//
// app is this program's QApplication.
// Here it is created and processes some of the command-line arguments (such as -display under X Window)
//

QApplication app (argc, argv);

//
// Create a main widget
//

QWidget *Widget = new QWidget;
Widget->setWindowTitle ("MainWidget");
Widget->resize (250, 500);

//
// Create a PushButton and the Label is "Hello World", it's parent is Widget
//

QPushButton *button = new QPushButton ("Hello World", Widget);

//
// Set the geometry of the widget relative to its parent
// This example is (20, 0) relative to it's parent
// button's size is width: 100 heigh: 50
//

// button->setGeometry (20, 0, button->sizeHint().rwidth(), button->sizeHint().rheight());
button->setGeometry (20, 0, 100, 50);

Widget->show ();

return app.exec ();
}


參考資料:

2011年9月25日 星期日

透過Qt的QRegExp翻轉檔案的開關

這次是透過QRegExp來翻轉Config.txt的特定開關,並且不改到其它的內容。
Config.txt定義在透過QRegExp分析檔案的開關

main.cpp

#include <QFile>
#include <QDebug>
#include <QTextStream>
#include <QStringList>

int main(int argc, char *argv[])
{
QFile FlagFile ("Config.txt");
QFile CopyFlagFlag ("CopyConfig.txt");
QStringList ConfigStringList;

//
// Test the Config.txt exists or not
//

if (!FlagFile.exists ()) {
qDebug () << "The flag file does not exist!!";
return -1;
}

//
// Try to open Config.txt
//

if (!FlagFile.open (QIODevice::ReadOnly)) {
qDebug () << "Can not oepn FlagFile!!";
return -1;
}

//
// Set QTextStream for Config.txt
//

QTextStream out (&FlagFile);

//
// Insert all the context into ConfigStringList
//

while (!out.atEnd ()) {
ConfigStringList << out.readLine();
}

// for (int i = 0; i < ConfigStringList.size (); i++) {
// qDebug () << ConfigStringList.at (i);
// }

//
// Try to create CopyFlagFlag.txt
//

CopyFlagFlag.open (QIODevice::WriteOnly | QIODevice::Text);

//
// Set QTextStream for CopyConfig.txt
//

QTextStream in (&CopyFlagFlag);

//
// Set the regular expressions for Flag format
//

QRegExp YesNoReg ("^(\\w+\\s*=\\s*)(YES|NO)(\\s*)$");

for (int i = 0; i < ConfigStringList.size (); i++) {

if (YesNoReg.indexIn (ConfigStringList.at (i)) != -1) {
//
// When the line match the regular expressions
//


if (YesNoReg.cap (2) == QString ("YES")) {
//qDebug () << YesNoReg.cap (1) << QString ("NO") << YesNoReg.cap (3);

//
// Invert YES to NO
//

in << YesNoReg.cap (1) << QString ("NO") << YesNoReg.cap (3);

} else {
//qDebug () << YesNoReg.cap (1) << QString ("YES") << YesNoReg.cap (3);

//
// Invert NO to YES
//

in << YesNoReg.cap (1) << QString ("YES") << YesNoReg.cap (3);

}
} else {

//
// When the line does not match the regular expressions
//


//qDebug () << ConfigStringList.at (i);
in << ConfigStringList.at (i);
}

if (i < ConfigStringList.size ()) {
in << endl;
}

}

FlagFile.close ();
CopyFlagFlag.close ();

return 0;
}


如此一開,只會改到開關,其它有幾個空白,有幾個tab完全不會動到。

參考資料:
透過QRegExp分析檔案的開關
QDataStream Class Reference

2011年9月24日 星期六

如何透過Qt讀取Unicode的檔案

今天試了一下,如何讀取Unicode的檔案,看起來,Qt都已經把它做好了,跟讀取ANSI的檔案方式沒有什麼差別。

這裡寫了一個例子,
Info.uni是一個Unicode(UTF-16)的檔案,執行這一個檔案會,
會多出一個CopyInfo.uni(UTF-16)的檔案與Info.txt(ANSI)

另外,因為,在Qt中,讀取UTF-16與ANSI的方式是一樣的,所以,
當你把Info.uni的內容改成ANSI的話,同樣程式可以work,
並且一樣會產生出CopyInfo.uni(UTF-16)的檔案與Info.txt(ANSI)

範例程式碼如下:
main.cpp

#include <QFile>
#include <QDebug>
#include <QTextStream>
#include <QStringList>

int main(int argc, char *argv[])
{
QFile UnicodeFile("Info.uni");
QFile CopyUnicodeFile("CopyInfo.uni");
QFile ANSIFile ("Info.txt");
QStringList ContainStringList;

//
// Try to open Unicode file
//

if (!UnicodeFile.open(QIODevice::ReadOnly)) {
qDebug () << "Open UnicodeFile error!!";
return -1;
}

//
// Create a QTextStream for UnicodeFile
//

QTextStream UnicodeOut (&UnicodeFile);

//
// Insert all the contain into ContainStringList
//

while (!UnicodeOut.atEnd()) {
//qDebug() << UnicodeOut.readLine();
ContainStringList << UnicodeOut.readLine();
}

UnicodeFile.close();

//
// Try to create a unicode file
//

if (!CopyUnicodeFile.open(QIODevice::WriteOnly)) {
qDebug() << "Open CopyUnicodeFile error!!";
return -1;
}

QDataStream CopyUnicodeData(&CopyUnicodeFile);

//
// Create Unicode header (FFFE) for CopyInfo.uni
//

CopyUnicodeData << (quint8) 0xFF << (quint8) 0xFE;
CopyUnicodeFile.close();

if (!CopyUnicodeFile.open(QIODevice::Append | QIODevice::Text)) {
qDebug() << "Open CopyUnicodeFile error!!";
return -1;
}

QTextStream CopyUnicodeOut (&CopyUnicodeFile);
CopyUnicodeOut.setCodec("UTF-16");

//
// Insert all the contain from ContainStringList into CopyInfo.uni (Unicode decode)
//

for (int i = 0; i < ContainStringList.size();) {
CopyUnicodeOut << ContainStringList.at(i++);
if (i < ContainStringList.size()) {
CopyUnicodeOut << endl;
}
}

CopyUnicodeFile.close();

//
// Try to create a ANSI file
//

if (!ANSIFile.open(QIODevice::WriteOnly | QIODevice::Text)) {
qDebug() << "Open ANSIFile error!!!";
return -1;
}

//
// Try to create a ANSI file
//

QTextStream ANSIOut (&ANSIFile);

//
// Insert all the contain from ContainStringList into Info.txt (ANSI decode)
//

for (int i = 0; i < ContainStringList.size();) {
ANSIOut << ContainStringList.at(i++);
if (i < ContainStringList.size()) {
ANSIOut << endl;
}
}

ANSIFile.close();

return 0;
}


參考資料:
QString Class Reference
建立一個Unicode檔案的簡單程式

2011年9月23日 星期五

透過QRegExp分析檔案的開關

今天寫了一個Qt的簡單的程式,可以用來分析一個檔案,並且把特定的位置的資料讀取出來,並且方便以後透過這一些讀取出來的設定,來做適當的動作。

假設目前有一個檔案內容如下
Config.txt

#
# This is mark
#

# Show Log or not
ShowLog = YES

# Print the User Name
PrintMyName = NO

# Show my age or not
ShowMyAge = YES # Comment for this item


程式碼如下:
main.cpp
#include <QtCore/QCoreApplication>
#include <QFile>
#include <QTextStream>
#include <QDebug>
#include <QRegExp>
#include <QStringList>

int main (int argc, char *argv[])
{
// QCoreApplication a (argc, argv);

QFile File ("Config.txt");

QString TempString;

QStringList TempStringList;

//
// Try to open file
//

if (!File.open (QIODevice::ReadOnly)) {
qDebug () << "Can Not open File!!";
return -1;
}

QTextStream out (&File);

//
// Insert all the string into TempStringList except the string start with '#' char and null line
//

QRegExp MarkReg ("^[^#].*$");
while (!out.atEnd ()) {
TempString = out.readLine ();

if (TempString.isEmpty ()) {
//
// If the line is null line, judge the next line
//

continue;
}

if (MarkReg.indexIn (TempString) != -1) {
// qDebug () << TempString;
TempStringList << TempString;
}
}

//
// Print the string in the TempStringList
//

for (int i = 0; i < TempStringList.size (); i++) {
// qDebug () << TempStringList.at (i);
}

//
// Print the string with YES flag in the end of the line
//

QRegExp YesReg ("^(\\w+)\\s*=\\s*(YES)\\s*$");
for (int i = 0;i < TempStringList.size(); i++) {
if (YesReg.indexIn (TempStringList.at (i)) != -1) {
// qDebug () << TempStringList.at (i);
// qDebug () << YesReg.cap (1);
}
}

//
// Print the string with NO flag in the end of the line
//

QRegExp NoReg ("^(\\w+)\\s*=\\s*(NO)\\s*$");
for (int i = 0; i < TempStringList.size (); i++) {
if (NoReg.indexIn (TempStringList.at (i)) != -1) {
// qDebug () << TempStringList.at (i);
// qDebug () << NoReg.cap (1);
}
}

//
// Print the string with YES or NO flag in the end of the line
//

QRegExp YesNoReg ("^(\\w+)\\s*=\\s*(YES|NO)(\\s*|\\s*#.*)$");
for (int i = 0; i < TempStringList.size (); i++) {
if (YesNoReg.indexIn(TempStringList.at (i)) != -1) {
// qDebug () << TempStringList.at (i);
qDebug () << YesNoReg.cap (1) << "is" << YesNoReg.cap (2);
}
}

// return a.exec ();
return 0;
}


參考資料:
QStringList Class Reference
QTextStream Class Reference
QRegExp Class Reference

2011年9月19日 星期一

建立一個Unicode檔案的簡單程式

最近可能要開發一個對Unicode(UTF-16)處理的工具~

今天在Qt上先試了一下如何建立一個Unicode的文件程式。

#include <QtCore/QCoreApplication>
#include <QFile>
#include <QTextStream>
#include <iostream>
#include <QtCore>

int main(int argc, char *argv[])
{
QCoreApplication a(argc, argv);

QFile file("binary.txt");
file.open(QIODevice::WriteOnly);
QDataStream out(&file);
//
// Create Unicode header (FFFE)
//

out << (qint8) 0xFF << (qint8) 0xFE;
file.close();

//QFile file("test.txt");

if (file.open (QIODevice::Append | QIODevice::Text)) {

QTextStream out1(&file);
out1.setCodec ("UTF-16");
out1 << "Hello World!!";
file.close();
}

return a.exec();
}


參考資料:
Qt4 Gossip: QTextStream
QDataStream Class Reference
QTextStream Class Reference

2011年9月18日 星期日

在Makefile裡面的command line設定變數值

在Makefile裡面的格式如下所示

target : prerequisites
command


請參考nmake 簡單教學

一般來說,要設定變數,只能在Makefile的最上面的部分
在上面那一個文章的Makefile的範例裡面,就是在everything之上設定變數

但是,我現在想做的是,依不同的target設定不同的數值~也就是想把設定數值的部分擺在command裡面。但是,在nmake的環境下,我在設定完後,直接印出來,似乎沒有達到效果。

target : prerequisites
SET TEST_VALUE=YES
ECHO $(TEST_VALUE)


最後,在多方嘗試之後,發現是可以達到我的需求的,但是,有以下幾點限制
1. 在目前的Makefile的command line設定的變數,必需觸發的下一個Makefile內才能使用
2. 變數必需不能有小寫

直接看例子吧~

Hello.c
#include <stdio.h>

int
main (
)
{
printf ("Good Morning!\n");
return 0;
}


例子一:
First.makefile
all:
[tab] SET TEST_VALUE=YES
[tab] nmake /f Second.makefile all

Second.makefile
# Program, flags, etc.
ASM = cl
OBJ = Hello.obj
TARGET = Hello.exe

all: clean everything
!IFDEF TEST_VALUE
[tab]ECHO $(TEST_VALUE)
!ENDIF

everything: $(TARGET)

clean:
[tab]- del $(OBJ) $(TARGET)

.c.obj:
[tab]$(ASM) $< /Fo$@

$(TARGET): $(OBJ)
[tab]$(ASM) $(OBJ) /Fe$@


執行指令
%> nmake /f First.makefile

如此一來,就可以在command line設定變數了,並且可以使用了。

但是,這樣的程式碼實在很難看~
那就用遞迴的方式,自己的Makefile呼叫自己的Makefile
Makefile
# Program, flags, etc.
ASM = cl
OBJ = Hello.obj
TARGET = Hello.exe

!IFDEF TEST_VALUE
all: clean everything
[tab]ECHO $(TEST_VALUE)
!ELSE
all:
[tab]SET TEST_VALUE=YES
[tab]$(MAKE) $@
!ENDIF

everything: $(TARGET)

clean:
[tab]- del $(OBJ) $(TARGET)

.c.obj:
[tab]$(ASM) $< /Fo$@

$(TARGET): $(OBJ)
[tab]$(ASM) $(OBJ) /Fe$@


執行指令
%> nmake

這一個Makefile會被執行兩次,在第一次的時候,TEST_VALUE變數並沒有被定義,
而第二次的時候,TEST_VALUE有被定義,如此一來,只需要一個Makefile就可以了

[2011.11.02 補充]
在make裡面,可以在target裡另外指定變數的值
foo = abc

all: foo = xyz
all:
[tab]echo $(foo)

這個時候的foo的值為xyz
以下的語法也提供相同的功能
all: override foo = xyz
all: export foo =xyz

但是,這個方法,似乎只能在linux下,正統的make下使用~
nmake並不支援這個語法~

參考資料:
Makefile 語法簡介

2011年9月5日 星期一

把exe與需要用到的DLL包成一個執行檔

最近為了使用Qt寫一些小工具,在研究如何把需要用到的library(DLL)在build time的時候就包進執行檔中~
把過程寫到如何build出不需要另外建置環境的QT exe檔
果然最後,還是沒有成功~~
目前release暫時的方法就是把需要用到的DLL檔跟執行檔放在一起@@,這樣就算使用者沒有Qt的環境,也是可以執行成功的。

現在找到另一個替代方案,就是如何把已經build出來的exe與其會用到的DLL甚至其它檔案包在一個exe檔案中,並且當使用者直接點兩下,可以執行我們的應用程式~~

目前找到winrar與7z(需另外安裝7z-sfx),與另一個好用的小tool 7-Zip SFX Maker(底層應該也是用7z-sfx完成的)
另外EXE Bundle - The EXE Binder,沒有試過

winrar:
1. 嘗試把要包在一起的檔案壓縮,並設定「建立自我解壓縮檔」

2. 到「進階設定」→「自解檔選項」
一般設定→解壓縮路徑→建立於現用的資料夾
一般設定→安裝程式→解壓縮之後執行→Calc.exe
模式→暫存模式→解幫裝至暫存資料夾
模式→安靜模式→全部隱藏

就會產生一個Winrar.exe的檔案,然後,直接執行它就可以了!!

7z-sfx (手動):
1. 先到7z網站下載SFX模組

2. 在製作自動解壓縮檔,只需要用到7zr.exe 與 7zSD.sfx這兩個檔案。
如何使用sfx,在Install資料夾裡面有範例~
3. 先把要包的檔案壓成7z

4. 編譯config.txt
這是設定 SFX for installers 在執行的時候的行為,包括解壓縮時要顯示什麼標題(Title)、是否要提示使用者按下確認後進行解壓縮(BeginPrompt)、或解壓縮後要自動執行哪支程式(RunProgram)、...等等。
;!@Install@!UTF-8!
Title="Simple Calc"
BeginPrompt="Do you want to run calc?"
RunProgram="Calc.exe"
;!@InstallEnd@!

詳細使用sfx的方式可以參考7z commmand的help裡面有說明~~


5. 把7zSD.sfx、config.txt、以及 Release.7z合併成執行檔,必需要透過windows內建的copy /b來完成~
copy /b 7zS.sfx+config.txt+Release.7z Release.exe
就會產生一個Release.exe的檔案,然後,直接執行它就可以了!!

7zip 進階自解壓縮檔產生工具 (自動):

7-ZIP SFX Maker (自動):

[2011.10.09 補充]
制作安裝檔
軟體王 - Inno Setup
Inno Setup

參考資料:
[問題]請問能將EXE和DLL包在一起成為一個可執行檔嗎?
如何利用 7-zip 設定自動解壓縮並解壓縮後自動啟動程式
7z-sfx 把7z檔案 製作成自解壓縮
製作屬於自己的WinRAR自解檔
7zSfxTool3.6.1.200(7z自解壓縮設定工具) 繁體中文

2011年9月2日 星期五

用Qt Creator寫一個簡單的計算機

之前有寫過一篇文章[Qtcreator - Qt的IDE],記錄Qt Creator的初體驗~
不過,當時也只是build完Qt的demo example後,覺得用Qt可以寫成這一些程式,覺得好厲害~
當時仍然以linux的環境為主,所以,初次嘗試就到此為止。

現在的主要環境改到Windows了(但是,我還是沒有放棄linux,有時候還是會玩一下)
要寫一些視窗介面的tool,因為,我用VC IDE寫程式的經驗幾乎是0,所以,我打算還是用Qt在windows下寫程式了。

2011年8月29日 星期一

alignment in the C

在建立struct時,有時候裡面的成員的排序很重要。
排序不同,會造成sizeof整個struct的值不同。

例如以下的例子:
struct aaaaa
{
  char a;
  int b;
  char c;
};

-byte數為12-

struct aaaaa
{
  char a;
  char c;
  int b;
};

-byte數為8-

========== START ==========

struct 的 alignment 有兩個, 首先是個別成員的 alignment, 然後是整個 struct 的 alignment.

首先, 每一個類型都會有它自己的 alignment requirement. 每個物件在記憶體裏的相對位置是:
  Offset % alignment-requirement == 0

假定在你的編譯器上, char 的 alignment requirement 是 1, int 的 alignment requirement 是 4.

在第一個 struct 裏, a 是在 offset 0 的位置, 而 b 則須在 offset 4 的位置. a 跟 b 之間會有 3 個 byte 的空格.

個別成員的 alignment 完成後就要做整個 struct 的 alignment. 這個關係到最後一個成員後面要加多少個 padding. 需要這個的原因是當你以 struct 來定義一個陣列的時候, 每一個 struct 元素都需要 align. 這時就要以到 struct 裡面最大的成員來做決定.

所以第一個 struct 最後一個成員 c 後面需要 3 個 bytes 的 padding. 這樣在陣列的架構下, 下一個元素的 b 也會 align:

    +=======+
  0 |a|x|x|x|
    |-------|
  4 |b      | 
    |-------|
  8 |c|x|x|x|
    +=======+
 12 |a|x|x|x|
    |-------|
 16 |b      |
    |-------|
 20 |c|x|x|x|
    +=======+
    |       |

第二個 struct 的 padding 結構:

    +=======+
  0 |a|c|x|x|
    |-------|
  4 |b      |
    +=======+
  8 |a|c|x|x|
    |-------|
 12 |b      |
    +=======+

而要解決此問題,最好在每一個struct裡面都放相同alignment的變數,
或是使用#pragma pack ()
A1:
#pragma pack(push, 1)
struct aaaaa
{
  char a;
  char c;
  int b;
};
#pragma pack(pop)

其中 "push" 的意思是先將原來的設定(可能是 4)暫存起來;而 "pop" 則是恢復原來的設定。

A2:
#pragma pack(1)
struct aaaaa
{
  char a;
  char c;
  int b;
};
#pragma pack(1)

意思是說,強制把alignment設定為1 byte

參考資料:
Visual C++ 的 Struct Memeber Alignment 問題與解決方法
C/C++ struct 的 alignment

Bit-field of struct

Bit-field 是一種省空間的特殊 data member, 可以使用特定幾個 bit 來放 data.

#include <stdio.h>

struct Data_Detail
{
  unsigned short s1 : 1;
  unsigned short s2 : 3;
  unsigned short s3 : 4;
  unsigned short s4 : 8; // 剛好塞滿一個 16 bit 之 unsigned short
};

typedef struct _Data_View {
  char v1 : 1;
  char v2 : 1;
  char Reserve : 6; // 保留6 bit,當以後需要可以使用
} Data_View;

int
main (
  )
{

{
  Data_View X;
  X.v1 = 0;
  X.v2 = 1;
  printf ("X.v1 is %d\n", X.v1);
  printf ("X.v2 is %d\n", X.v2);
}

{
  struct Data_Detail Value;
  Value.s1 = 1;
  Value.s2 = 2;
  Value.s3 = 3;
  Value.s4 = 4;
  printf ("Value.s1 = %d\n", Value.s1);
  printf ("Value.s2 = %d\n", Value.s2);
  printf ("Value.s3 = %d\n", Value.s3);
  printf ("Value.s4 = %d\n", Value.s4);
}

  return 0;
}


建議同一個struct裡面的Bit-field是同一型別,避免因為不同型別而導致錯亂。

若不同的type放在同一個struct裡面,我猜想每一個同型別所需要的空間會算在一起。
例如:
char v1 : 1與char v2 : 1與char Reserve : 6所需要的空間一共是8bit,剛好就是一個char。
所以,用sizeof (Data_View)會是1 (byte)


若在Data_View的結構裡面,加入一個unsigned short s4 : 1
其中unsigned short 是 2 bytes
用sizeof (Data_View)的值會是4,我猜原因是char與unsigned short是分開算的,並且以其中一個最大的為單位,
因為最大是unsigned short是2 bytes,所以,一共是4bytes。

不過,我想這個結果可能跟不同的Compiler不同,而結果有所不同。

參考資料:
Union and Bit-field

2011年8月25日 星期四

在win7下建立一個external partion

在WIN7下,並沒有辦法直接透過Disk Management去分割出一個Extended Boot Record(延伸磁區)

但是,仍然可以透過WIN7內建的指令來建立Extended Boot Record,

1. 透過administrator去開啟cmd
2. > diskpart
3. DISKPART> list disk
4. DISKPART> select disk 0
5. DISKPART> create partition extend size = 40960
6. DISKPART> create partition logical size = 40960

把id改為84
7. DISKPART> list disk
8. DISKPART> select volume = x
9. DISKPART> set id=84 override


其它:
delete partition [noerr] [override]
delete partition 指令可以刪除目前設為焦點的磁碟分割。
Diskpart 不允許刪除目前的系統、開機或分頁磁碟區。若要刪除 ESP、MSR 或已知的 OEM 磁碟分割,您必須指定 override 參數。

參考資料:
[Tutorial] 如何在 Windows Vista / 7 下分割延伸磁區 (Extended Partition) ?
Diskpart 指令行公用程式的說明

2011年8月23日 星期二

讓程式碼的function內的component比較容易被抽換

讓程式碼的function內的component比較容易被抽換


當一個函式很大時,裡面包含許多component,為了程式碼容易看,
在程式中可以透過大括號把一個函式分成許多部分~

如以下的例子:

#include <stdio.h>

int
main (
)
{
  int y = 2;

  printf ("Hello, Y value is %d\n", y);

#ifdef FOMLOAD
{
  int x = 1;
  printf ("X value is %d\n", x);
  printf ("Y value is %d\n", y);
}
#endif //#ifndef FOMLOAD

//  printf ("X value is %d\n", x); // variable x does not exist in this scope

  return 0;
}


如此一來,被FOMLOAD包起來的程式碼,就可以依照FOMLOAD在Build Time的時候就決定要不要被執行~
這樣一來程式碼比較容易讀,在抽取的Component時,也比較容易。

另外,在上面的例子中,在大括號被宣告的int x變數,其能被存取的也只有在大括號中。

如此一來,更可以節省一些記憶體的空間。

另外,為了讓程式設計師比對有使用這一個方式跟沒有的差別。
以下是沒有使用這一個大括號的設計方式的程式碼;

#include <stdio.h>

int
main (
)
{
#ifndef FOMLOAD
  int x = 1;
#endif //#ifndef FOMLOAD
  int y = 2;

  printf ("Hello, Y value is %d\n", y);

#ifdef FOMLOAD
  printf ("X value is %d\n", x);
  printf ("Y value is %d\n", y);
#endif //#ifndef FOMLOAD

//  printf ("X value is %d\n", x); // variable x does not exist in this scope

  return 0;
}


如此一來,被FOMLOAD被分散在兩個地方,目前這一個例子的程式碼比較小,可能看不出差異,
當程式碼很大時,這兩個部分可能會被分散在好幾行之後(因為,宣告變數一定要在function的開頭)
這樣程式在可讀性上,就比較差。

Makefile
# Program, flags, etc.
CC = cl
CCFLAGS = /c
OBJ = WithCurelyBrace.obj
TARGET = WithCurelyBrace.exe

!IFDEF NOTSHOW
FLAGS =
!ELSE
FLAGS = /DFOMLOAD
!ENDIF

everything: $(TARGET)

clean:
[tab]del $(OBJ) $(TARGET)

all: clean everything

.c.obj:
[tab]$(CC) $(CCFLAGS) $< /Fo$@ $(FLAGS)

$(TARGET): $(OBJ)
[tab]$(CC) $(OBJ) /Fe$@


指令如下:
nmake all NOTSHOW=1
不會顯示括號內的指令

nmake all
會顯示括號內的指令

2011年8月22日 星期一

海報列印軟體

Easy Poster Printer
RonyaSoft Poster Printer
可以印大張的圖片檔

PosteRazor
可以把大張的圖片檔轉成pdf

參考資料:
想印大海報印表機卻不夠大怎麼辦?用Easy Poster Printer來幫你分割列印吧!
免費的海報分割列印軟體 PosteRazor
Portable RonyaSoft Poster Printer 3.01.16 繁中隨身免安裝版

Snagit截圖軟體

功能很強大的截圖軟體...

2011年7月26日 星期二

如何build出不需要另外建置環境的QT exe檔

目標是如何在透過QT寫出執行檔,並且直接在另一台沒有QT的library環境上執行

測試過程:
下載程式碼:

1. 先讓qmake去掃整個程式檔案架構 (產生hello.pro)
%> qmake -project

2. 再用qmake依hello.pro產生Makefile
%> qmake

3. 開始編譯
%> mingw32-make release

若直接在原本的command windows執行檔案,會成功,但是,若是用點滑鼠點兩下的方式,會失敗,並且出現出現找不到mingwm10.dll的錯誤。
原因是,目前使用的是動態連結lib的方式,所以,在執行時,會去%PATH%的目錄中尋找相對應的lib。因為,我們若是用QT的command windows,因為,%PATH%都已經設定好了,所以,可以找到相對應的lib。
若我們直接用滑鼠點兩下的方式,吃的是系統預設的PATH,所以,會出現找不到lib的錯誤訊息。
有兩個解決方式
1. 把需要的lib放在系統的%PATH%路徑中
2. 編譯出靜態連結執行檔(執行檔會變的比較大)

Q: 出現找不到mingwm10.dll錯誤
A1: 在Makefile裡面把-mthreads刪除
A2: 直接在hello.pro加入以下內容 (參考qmake.conf相對應的Flag)
QMAKE_CXXFLAGS_EXCEPTIONS_ON -= -mthreads
QMAKE_LFLAGS_EXCEPTIONS_ON -= -mthreads
A3: 直接在win32-g++\qmake.conf 移除掉所有的"-mthreads".

Q: 出現找不到libgcc_s_dw2-1.dll錯誤
A1: 在Makefile裡面的FLAGS加入-static

Q: 出現找不到QtCore4.dll錯誤
A1: ...
A2: 直接把mingwm10.dll, libgcc_s_dw2-1.dll, qtcore4.dll, qtgui4.dll放到與執行檔同一個目錄

參考資料:
用Qt Creator開發Windows的簡單計算機的程式
記錄-如何建立MSVS的Qt編譯環境?
[Mobile]Nokia的開發工具-Qt framework
[Qt密技]執行Qt程式時找不到相關dll檔該怎麼辦?
Removing mingwm10.dll dependency
QT static 出現找不到libgcc_s_dw2-1.dll
windows下 Qt 静态编译
Qt 程序在 windows 下的发布
Deploying an Application on Windows

2011年7月11日 星期一

2011年7月8日 星期五

在Source Insight直接透過vim打開目前的檔案

透過以下的設置,可以直接在Source Insight透過Vim打開目前已開啟的檔案。

我直接在Alt+a設定成呼叫Vim,並且跳到游標所在的行~

1. Source Insight工具列OptionsCustomer Command...Add...New Command name填入EditWithVim
2. 在Run的欄位填入: E:\Portable\PortableApps\gVimPortable\gVimPortable.exe --remote-tab-silent +%l %f
意思是說透過vim打開目前的檔案,並且跳到指定的行
%l指的是當前的行
%f為檔案名稱
3. Source Insight工具列OptionsKey Assignments
4. 在Command的欄位打入EditWithVim,並且按Assign New Key...→直接按Alt+a

大功告成了

[2012.08.02 補充]
設定Source Insight可以直接打開目前檔案的目錄
設定的流程跟上面類似

我直接在Ctrl+d設定成開啟目前瀏覽檔案的目錄~

1. Source Insight工具列OptionsCustomer Command...Add...New Command name填入Explore Project Folder
2. 在Run的欄位填入: explorer %d

意思是說開啟目前瀏覽檔案的目錄~
%j為the source directory of the current project
3. Source Insight工具列OptionsKey Assignments
4. 在Command的欄位打入Explore Project Folder,並且按Assign New Key...→直接按Ctrl+d

完成~~

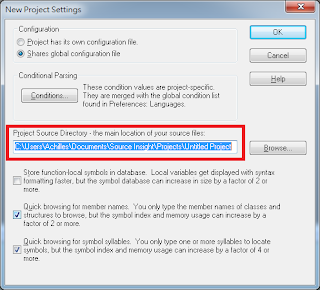
[2014.03.31 補充]
開啟Project的根目錄,
而這一個要可以work,
在建立目錄時,必需要設定project的根目錄在哪裡。


在Options→Customer Commands→Add→Explore Project Root Folder→在Run裡面輸入「ShellExecute explore %j」→Close

Options→Key Assignments→選擇「Explore Project Root Folder」→按「Assign New Key...」→接著按你想輸入的key

參考資料:
鱼与熊掌可兼得: vim和source insight的配合使用
source Insight常用自定义命令和一些小技巧[z]
Source Insight Help - Custom Commands